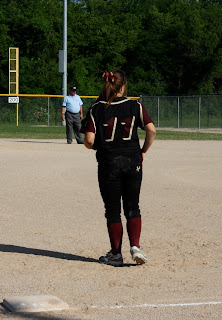
My first tutorial ever. This is exciting! Well, let me start out with the back story of these headbands. We've moved recently, one of the great things about this move is that we are close to family. The past 2 weekend we have had the priviledge of going and watching some of the young women in our family compete in sporting events. On a side note, I love that our girls are being exposed to this at an early age.
Anyway, two weekends ago we were at a BIG softball tourney. When we walked in there were a bunch of vendors. One was selling these awesome headbands. I saw high school girls walking around and playing in these headbands. I decided I needed a closer look. Adjustable! I had never seen adjustable headband before....this is exciting for this big headed girl with big headed kids. I was going to buy one and try it out....until I realized she was charging $13! YIKES. Our cousins teammate had a similar headband from a store in her hometown, I asked to look at it and took a couple of pictures of the adjustable portion.
When I got home I scoured through Pinterest and didn't see anything similar.... After completing the first one I sent pictures to my other crafty girls and they asked me to do a tutorial. I have never done a tutorial for a project before, so I apologize if its a little rough around the edges.
 |
| After wearing it all evening the day I made it, I was convinced this was a winning project. Ended up wearing it most of the weekend! |
Supplies:
Lingerie strap slides & rings (I found them in the notions section and used a 40% off coupon)
scissors
thread
3/8 elastic
coordinating ribbon
1/4 yrd 'fancy' fabric....I chose a black sequin
1/3 yard of 'padding' fabric I chose a black flannel because it was going to show through with the sequin fabric, I wanted it to be comfortable against my head, absorb sweat...but not be too hot
 |
| First cut your strips of fabric. Now you must make adjustments depending on the size head you are working with. My 3 y/o isn't crazy about headbands right now, so I was making these for adults and teenagers. I cut my fabric about 14 inches length and about 2 1/2 inches wide. This is larger than it'll end up, but I like to leave a little room for mistakes. I cut one strip of the sequin and two for the flannel |
 |
| Next, organize your strips of fabric. You are going to sew this like a pillow, so make sure and arrange your 'fancy' fabric facing down so that when you sew and flip it will be on the right side. Also, cut a small piece of coordinating ribbon about 2-3 inches long |
 |
| Next, add the ring portion to the ribbon. Pin to the fabric with only the ends showing. You will be sewing over this portion. The ring will be on the outside of the headband once it is sewn and flipped. |
 |
| Okay, all ready to start sewing. Sew around the two long sides and the short side that has the ring on it. Be sure to leaver one side open. Be sure to sew the ribbon/slide very well. I recommend going over it 5 or 6 times. |
 |
| After sewing (straight hopefully in my case) trim very close. You don't want to have too much extra fabric for a bulky headband. Now time to flip it right side out! |
 |
| Now time to cut your elastic. This like the other measurments depend on the size nugget you are making this for and hoe adjustable you want it to be. This piece is probably around 5 inches. a portion will be stuck inside the open end and attached there. |
 |
Center the elastic on the end and fold the fabric under to make a finished hem. Now time to make a finished stitch/hem all the way around. This helps the headband be smooth and flat and look finished. Just like with the ribbon, make sure you sew over the elastic several times so that it is very secure.
Now for the complicated part of making it adjustable... |
 |
| put the slide on so that it will be facing out rather than against the head |
 |
| Then loop through the ring and take it back through the slide from the bottom. |
 |
| Here's what it should like prior to fastening the elastic. Fasten the elastic back to itself on the bottom of the two pieces of elastic. Before you sew, I always pin it or hold it to ensure that the adjustable portion is working okay. This is hard to describe, but I think you'll find that trying it out is the best way to ensure that it works perfectly. Another tip, I find that it is easiest to do this when the strap is pulled to the almost biggest point of the headband |
And .....Taaaa Daaaa..... you have an adjustable headband. I calculated (and of course used coupons at the fabric store) and made these for about $1.06 + tax each.
Hopefully you all were able to understand and follow my jibberish! Enjoy and happy crafting!


.JPG)


